Congratulations! Your Radio Upgrade Request Was Received
Review The Below Instructions And Video To Update Your Radio.
You should receive your new radio in the mail within the next 7-10 days.
Follow these simple steps to upgrade your radio.
Contact Us
Support Phone Number: 855.699.8181
Support Email: Upgrades@adssecurity.com
Tools You Will Need
- Key to the main alarm box (Provided in the box sent to you with your new radio)
- Phillips head screwdriver
Step 1:
Support at 855.699.8181 to turn your system on test mode.
Step 2:
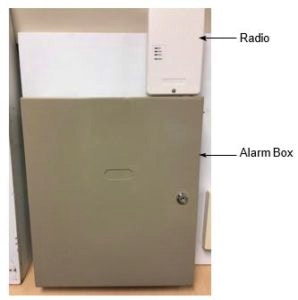
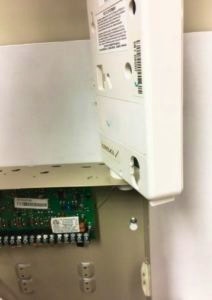
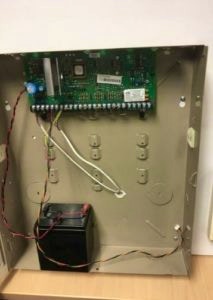
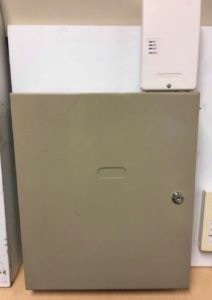
Locate the main alarm box and radio installed in your home or business. In most homes, the alarm box is installed in a closet. If you don’t see the radio attached to your alarm box as shown in the image to the right, please call 855.699.8181 for assistance.
Step 3:
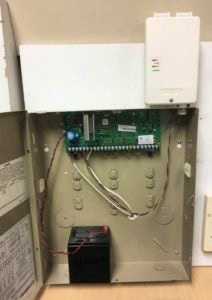
Using the key included in the box with your radio, unlock and open the main alarm box.
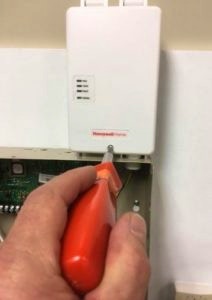
Step 4:
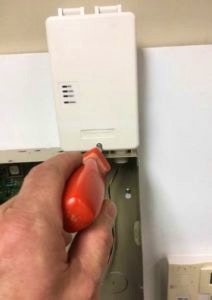
Locate the screw at the bottom of the radio. Loosen the screw with a Phillips head screwdriver. Open the front cover of the radio casing.
Step 5:
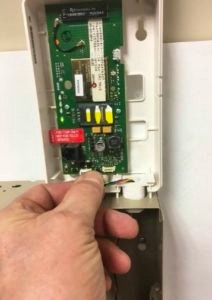
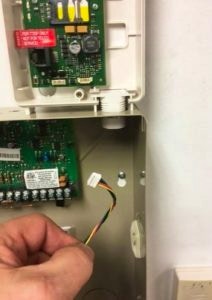
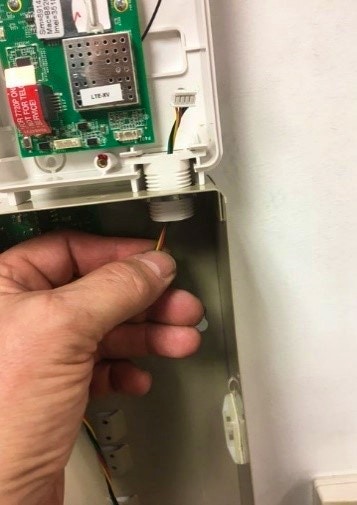
Once inside the radio, pull the wire towards you and remove the plug from the radio.
NOTE: If an external antenna (coaxial) is connected, disconnect it from the connector at the top of the radio case and move it to the side. It will not be used with the new radio.
NOTE: Your system will go into radio trouble after removing the wires. Enter your 4-digit user code and then the number 1/off key on your keypad to silence the trouble condition.
Step 6:
Pull the wire from the radio housing back into the main alarm box through the opening.
Step 7:
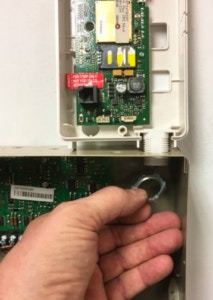
Twist the entire radio as pictured to the right counter-clockwise to unscrew the radio casing. Remove the mounting nut.
Step 8:
Remove the radio and set it aside. Keep the original radio nearby until the replacement is completed.
Step 9:
Open the new radio box that was sent to you and unpack the contents.
The box will include:
- Radio with plastic threaded mount
- Key to access your alarm panel
Step 10:
Open the cover of the new radio using a Phillips head screwdriver.
Step 11:
Insert the threaded mount through the mounting hole where the previous radio was installed.
Step 12:
Tighten the mounting nut onto the threaded mount turning clockwise.
Step 13:
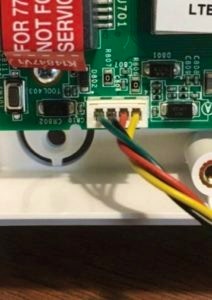
Re-insert the wire from the main alarm box through the threaded mount and into the radio housing. Attach the connector to the plug on the bottom left
NOTE: Reinsert the plug with the green wire on the left side. See picture for proper connection
You will see the LED lights on the left side of the radio start to light-up in sequence (green ➔ yellow ➔ red ➔ green).
Step 14:
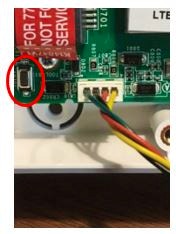
When the LED-sequencing stops (this may take up to 15 minutes) the LEDs should be showing solid green on the top LED, no red light on the middle LED, and a solid green on the bottom LED. If this is the case, press the button circled in red to the right 3 times. Then, wait for the radio to register. Your radio has successfully registered when the only light showing is the bottom green light.
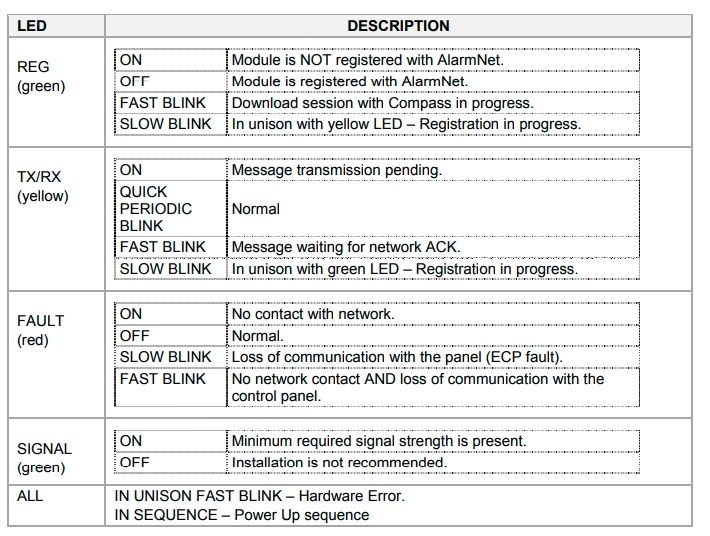
NOTE: If your radio does not successfully register, or if your LEDs don’t match the description in Step 16, please disconnect the wire you connected in the previous step, wait 30 seconds, and then reconnect it. This will start a power cycle reset. Then, please wait for the LED-sequencing to stop. Once the LED sequencing stops and your LEDs show a solid green top LED, no red light on the middle LED, and a solid green bottom LED, please press the button circled in red to the right 3 times. Then, wait for the radio to register. A chart explaining the LED lights and what they are communicating is provided to the right.
Step 15:
Clear radio troubles on the keypad, you must enter your 4 digit user code and then the number 1 (OFF) two times consecutively. A single beep will occur after each valid entry is made.
Step 16:
Close the main alarm box and lock with the key.
Step 17:
Call the ADS Support at 855.699.8181 to take your system
off of test mode and also ask for the agent to walk you through testing that your
new radio is correctly sending signals to the Monitoring Center.
Replacement Completed – Fantastic job!
Thank you for completing your radio upgrade